Blog

Mould, Mould, Mould

Sunday, October 13, 2019


If I had a quid for every time someone brings this subject up I would not be sat here writing this blog! I would be sailing on my Yacht (not yet purchased) somewhere exotic (location not yet decided).


Here is a ***spoiler alert!***


***EXTRACTOR FANS ARE NOT THE ANSWER***


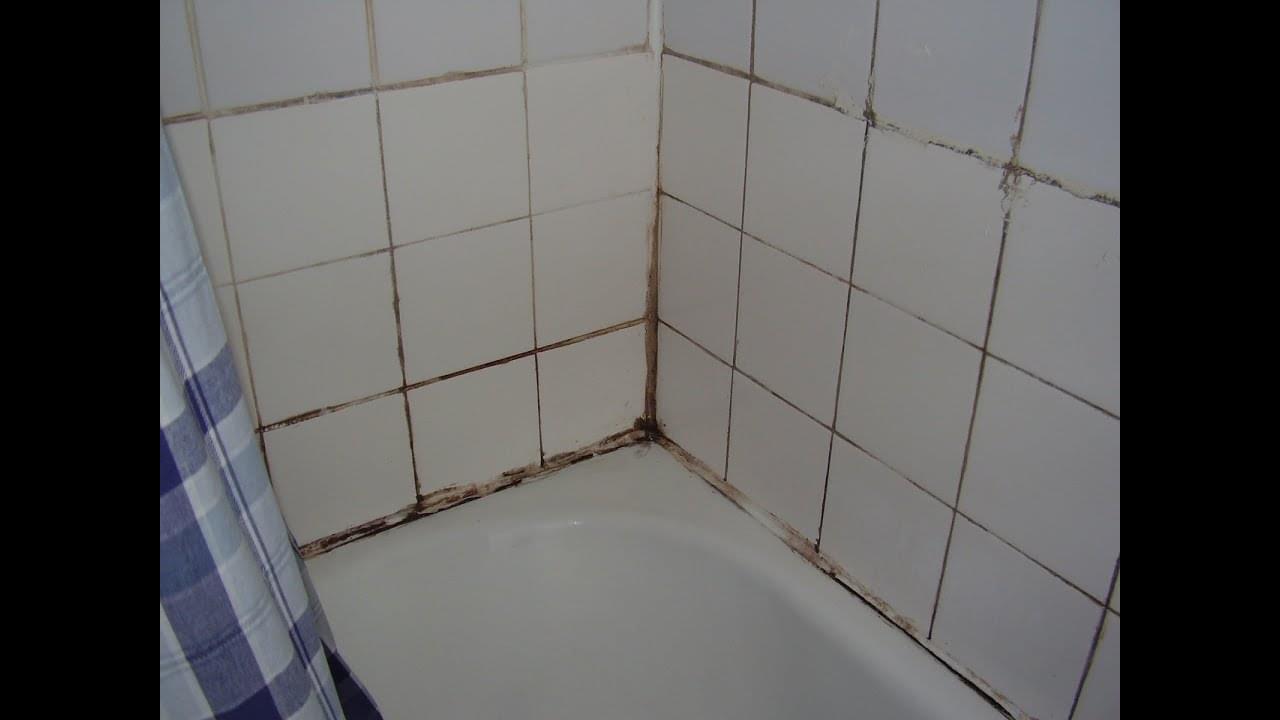
There is no silver bullet to solving or preventing the issue, I have been in bathrooms less than 5 years old full of mould, and some bathrooms older than 30 years without a trace of the stuff.


Modern properties that are more insulated, can suffer the worst, due to lack of airflow! Older more draughty properties are usually less affected. Airflow plays a massive part. 


So what are you doing that is promoting or preventing the mould starting?


One thing is for sure, once it’s started it’s not easy to stop, so prevention is far more effective than any cure, if there is one (that works).


In the worst cases I have seen, there are usually a combination of 2 things going on:

  1. Poor installation methods
  2. Poor maintenance


Either one on their own are enough to get things moving in the wrong direction, but when put together it can be really devastating to the look and integrity of the whole installation.


So what can be done?


During the installation:

  1. Ensure gaps being filled are minimal - Filling large gaps with grout & silicone above 3-4mm wide is not a good idea.
  2. Use quality sealants & grouts with anti-fungal properties and apply only to clean surfaces to they adhere properly the first time and do not ever need - reapplying.
  3. Work in grout and sealants to ensure no air gaps gaps
  4. Use suitable paint on walls where required


After installation/ end user maintenance:

  1. Before first use, spray all grout joints with a protective spray, and re-apply as per instructions
  2. Leave the window ajar during showering, and for as long as possible afterwards (permanently if possible)
  3. Clean down bath and shower areas immediately after use, remove all soap & residues.
  4. Use a squegie or cloth to remove all water from ceramics, tiles and surfaces into the drain. 
  5. Ensure water is removed from the floor outside the shower or bath area.
  6. Remove wet towels and clothes from the room when the room is not in use.
  7. Ensure walls and floors are dry before the window is closed or fan turned off. Water left in the room will evaporate into the room, and this is where the problem starts.
  8. Leave the bathroom door open when you are done, allow some air in.
  9. Remove dust from the room like you would any other during the house clean process

All of the above, and no mention of an extractor fan…..


But Finally.


If you do have an extractor fan:

  1. Make sure there is airflow into the room from the house, leave the bathroom door open, do not close the bathroom door and windows and trap all the steam in the bathroom and expect the fan to sort it out, because it won’t!
  2. Leave the fan on for as long as possible, a fan with a humidity sensor is a good idea but if you don’t have any other ventilation from a window to help move the air around it won’t turn off any time soon!


Opening the window for 5 minutes is far more effective than a fan running for 20.


Remember, an extractor fan moves air - not steam. It will help clear steam if the air is allowed to flow through the room...... with the help of the extractor.


We offer a 3 year warranty with all of our bathrooms and we advise on how to care for your bathroom in more detail after your installation is complete.


Blog written by Aaron Dronsfield, Bathroom Installation Services


Book Now